
Quick Verdict
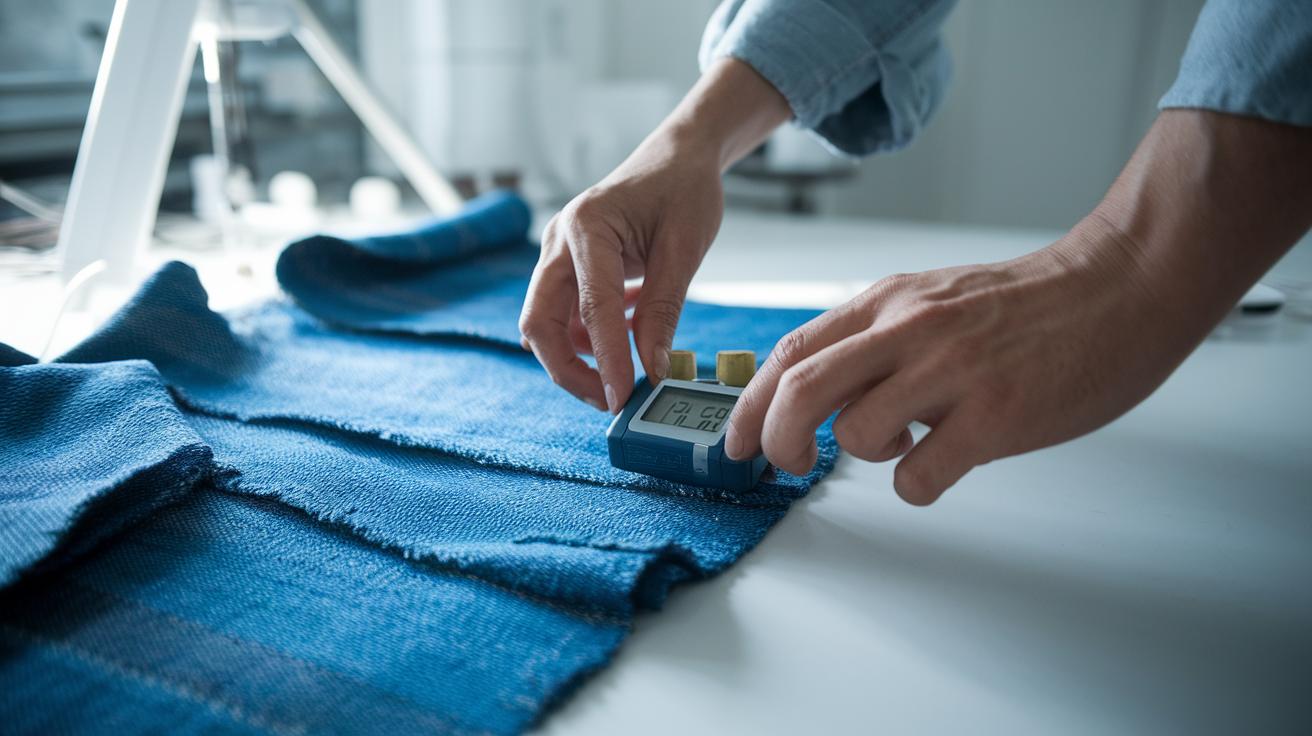
Ever wonder if your favorite tee can handle everyday wear? We put together a hands-on test that shows you how to check if your clothes can take a beating.
Why Try It
Daily wear can cause tiny rips and fray before you even notice. In this guide, we break down a simple method to test fabric strength. Think of it as giving your tee a gentle, repeated rub to see how it holds up.
How It Works
We explain a basic abrasion test (a method where the fabric is rubbed repeatedly) and a simple tear strength check. These tests spot any weak spots early so you can avoid a wardrobe headache later.
Takeaway
Learning these tests can help you keep your wardrobe in tip-top shape. With clear steps and easy-to-understand tools, you’ll know exactly what to look for when checking if your clothes are built to last.
Step-by-Step Clothing Wear and Tear Test Procedure

This procedure lays out how we check if a fabric lasts under normal use. We want to see if the material can stand up to wear without breaking down too quickly. Tests like the Martindale abrasion test (rubbing the fabric many times until you see damage) and the Wyzenbeek method (using a simple back-and-forth rub with a mesh) help us see this clearly. We also check tear strength with either an Elmendorf tester or a CRE tester (devices that measure how much force it takes to rip the fabric), following standards like ISO 13937 and ASTM D1424.
-
Sample selection – Pick fabric pieces that best show what the whole garment is like. Test spots that get a lot of wear as well as areas that see less stress.
-
Equipment calibration – Set up your machines properly. Check that tools like abrasion and tear testers give accurate readings with known weights to avoid any mix-ups.
-
Abrasion testing – Use the Martindale test with its figure-eight movement or run the Wyzenbeek test with steady back-and-forth motions until the fabric shows signs of wear. For example, after around 12,000 rub cycles, you might notice a few broken yarns.
-
Tear strength analysis – Set up the Elmendorf or CRE tester to measure how tough the fabric is. Look for any drop in the required force, which hints the fabric is losing its strength.
-
Lifecycle simulation – Run the fabric through repeated wear cycles that mimic real-life use. This can include washing, exposure to the elements, and friction from regular use.
-
Data recording – Log every test result in a simple table for easy comparison. For example:
| Sample ID | Test Type | Result |
|---|---|---|
| 1 | Abrasion | 12,000 cycles – slight wear |
| 2 | Tear Strength | Force drop indicating fabric fatigue |
Every step builds a picture of how well a fabric will do over time in real life.
Essential Materials and Equipment for Garment Durability Testing

When testing fabric durability, choose your machines carefully. Tools like the Martindale Abrasion Tester and the Wyzenbeek device help mimic the kind of rubbing clothes face every day. For checking tear resistance, the Elmendorf tear tester and tensile machines (which pull until the fabric breaks) are key. You also need the right materials, such as worsted wool discs, wire mesh, and cotton duck, to apply even stress. Keeping these machines clean and well-maintained is important for steady, reliable tests.
Calibration and safety are just as important. Follow ISO 7500 guidelines by starting calibration at 20% of the machine's capacity and checking accuracy with known weights. Always wear safety gear like cut-resistant gloves and safety glasses, and use machine guards to protect against moving parts. This routine not only keeps your tests accurate but also helps protect you during testing.
Conducting an Abrasion Resistance Test on Fabrics

Both the Martindale and Wyzenbeek tests check how fabrics stand up to repeated rubbing, but they do it in different ways. The Martindale test uses a tricky figure-eight pattern (called a Lissajous curve) to spread out the wear evenly. This test usually goes through 10,000 to 50,000 cycles before you see signs of wear like broken yarn or changes in the surface. On the other hand, the Wyzenbeek test rubs the fabric back and forth in a straight line along both the warp (up and down) and weft (side to side) directions. This method focuses on linear stress, and fabrics that can handle more than 15,000 double rubs are seen as very durable.
| Test Method | Abrasive Medium | Motion | Cycle Range |
|---|---|---|---|
| Martindale | Worsted wool discs or wire mesh | Figure-eight (Lissajous curve) | 10,000–50,000 cycles |
| Wyzenbeek | Cotton duck or wire mesh | Straight back-and-forth | 15,000+ double rubs |
Which test you choose depends on how the fabric will be used. If the fabric needs to handle rubbing from many different directions, the Martindale test gives a better overall picture. But if the fabric faces mainly straight rubbing, then the Wyzenbeek method can be more useful. Check the fabric type and how it will be used to decide which test will tell you more about its everyday performance.
Performing a Tear Strength Analysis on Clothing

Start by getting your fabric samples ready. Cut them to a standard size according to your testing rules. For denim or linens, use a size that meets the guidelines. If you're using an Elmendorf tester (ISO 13937-2), adjust the grips and cutter so the fabric stays in place. If you have a CRE tester, set the speed to 1000 mm/min as the ASTM D1424 suggests. Make sure the machine is calibrated with known weights before you begin. Also, remember that fabrics with texture or a light coating might need extra care so they do not get damaged too early.
Next, study the tear curves. Record the force measurements and look for a drop of at least 10% to spot a valid tear point. Ignore any early, wild peaks that might confuse you about the fabric’s real strength. If your fabric has a protective coating or laminate, expect a tear strength drop of about 20-30% because the yarns cannot move freely. For very weak fabrics, you might need to test them in multiple layers (multi-ply). Just keep in mind that multi-ply tests give different numbers compared to single-ply tests. This careful process helps you judge how well the fabric can handle stress and wear over time.
how to perform a clothing wear and tear test: Amazing

Accelerated aging tests let us see how a garment will hold up over time without waiting years. One common method simulates up to 50 wash and dry cycles, which roughly equals a year of normal wear. For areas that get a lot of movement or friction, machines called flex testers and abrasion devices run over 100,000 cycles to put extra stress on seams and other high-friction spots.
We also use chambers that control UV light, humidity, and temperature to mimic everyday conditions. For example, shining strong UV light on a fabric for several hours can show how it might fade under summer sun, while a moist environment tests what happens when the material absorbs water. These techniques help reveal potential breakdowns much sooner than everyday use would.
Matching these cycle counts to real-world wear is key. Testers combine repeated folding and strength tests (tensile cycling) to spot wear points in zippers, seams, and stretch fibers. If a fabric handles 100,000 cycles without much damage, you can be pretty sure it will hold up over long-term use. This kind of systematic testing not only predicts performance but also guides better design and material choices for garments built to last.
Evaluating Fabric Wear and Recording Data for Clothing Tests
Picking the right measures is key to understanding how long a fabric will last. We look at a few main tests, such as the number of wear cycles until the fabric shows a tear, the force needed to rip it apart (measured in newtons), and the percent drop in the fabric's strength over time. These tests help us compare how fabrics hold up by matching standards like ASTM D4966, ISO 13937, and AATCC guidelines. For example, counting the cycles until you see wear lets us see how fabrics stack up against each other. Checking the tear strength shows how much force it takes before the fabric gives out. And tracking the loss in strength shows how the material degrades with use. Using digital data loggers and special software makes it easier to capture this data accurately and cuts down on mistakes.
Recording these findings in a clear and simple way is crucial for quality checks. A basic table with columns for Sample ID, Test Type, Metric, and Result helps keep things organized. For instance, you could set up your data like this:
| Sample ID | Test Type | Metric | Result |
|---|---|---|---|
| 1 | Abrasion | Cycles to Failure | 14,000 cycles |
| 2 | Tear Strength | Force (Newtons) | 250 N |
This tidy layout makes it easy to see how the fabric stands up to wear over time, which in turn helps improve the way clothes are made and tested.
Safety Precautions and Best Practices in Clothing Stress Testing

First, check that every piece of equipment has secure guards and proper emergency stops to keep you safe from pinches or cuts. Before you start any testing, make sure the machines meet ISO 7500 calibration standards (a guideline that stops samples from being overloaded) to protect both the fabric and the equipment.
Wear your personal protective gear at all times. This means using cut-resistant gloves, safety glasses, and a lab coat to guard against sharp edges and moving parts. If you’re testing fabrics that are coated or treated with solvents, work in a well-ventilated area to avoid breathing in harmful fumes.
Regularly inspect your gear for any signs of wear or damage. Also, check that all emergency procedures are posted clearly and understood by everyone around. This careful routine not only keeps you safe but also helps maintain test accuracy and extends the life of both your equipment and fabrics.
Tips for Home vs. Professional Garment Wear and Tear Evaluation

When it comes to checking how well fabric holds up, you have two main choices. At home, you can try simple tricks like rubbing the fabric with sandpaper or using a jar to test wear. These methods give you a rough idea, but they don't repeat tests as well as professional tools do. Professional labs use devices like the Martindale, Wyzenbeek, and universal testers. These machines follow ASTM or ISO guidelines (standards to ensure accurate results) and give precise, verifiable data.
Professional tests usually cost between $50 and $200 per sample and take one to three weeks. They are best if you need certified results for compliance or warranty claims. For quick checks or personal curiosity, home tests can work, but they won't replace a certified lab report when you need official documentation.
For anyone who wants to try testing at home, here are four practical tips:
- Document your process carefully. Even simple tests are more useful when you record repeated measures to see clear trends.
- Try to mimic lab conditions by keeping the pressure or number of cycles consistent. You could use a timer or count your strokes to increase reliability.
- Compare your results with published benchmarks from accredited testing. This helps you understand how your fabric measures up.
- If you need formal data for quality control or assessments, reach out to professional services so your garments meet industry standards.
These steps help balance home experiments with lab-grade evaluations, making it easier to understand a clothing item's lifespan and overall durability.
Final Words
In the action, this guide broke down a step-by-step clothing wear and tear test procedure. We covered sample selection, calibrating testers, and specific fabric tests like abrasion and tear strength. It also shared tips for simulating repeated use and safely recording results while comparing home methods with professional evaluations.
Each step helps you understand how durable your favorite pieces can be. Now you know how to perform a clothing wear and tear test, leaving you confident in your choices and ready for smart shopping.
FAQ
How to perform a clothing wear and tear test PDF
The clothing wear and tear test PDF outlines a step-by-step process covering sample selection, equipment calibration, abrasion testing, tear strength analysis, lifecycle simulation, and data recording to assess fabric durability.
What is the method of a tearing test?
The tearing test method measures the force required to create and propagate a tear in fabric using instruments like the Elmendorf tester or CRE tester under ISO or ASTM standards.
How do I test the durability of a fabric?
Testing fabric durability involves procedures such as abrasion resistance tests, tensile strength measurements, and tear resistance evaluations using standardized equipment like Martindale and Wyzenbeek testers.
What is the recommended method for testing fabric?
Recommended fabric testing methods include abrasion tests (Martindale or Wyzenbeek) and tear tests (Elmendorf or CRE) following ASTM and ISO protocols to ensure reliable and repeatable durability measurements.
What does wear and tear in clothes mean?
Wear and tear in clothes refers to the gradual damage from repeated use, including fabric abrasion, thinning, and small tears, which are commonly measured through standardized durability tests.
What is a fabric tensile strength test?
A fabric tensile strength test measures the amount of force needed to pull a fabric apart, providing insights into the material’s strength and its ability to withstand stretching under load.
How does tear strength compare to tensile strength, and what are the units used?
Tear strength focuses on the fabric’s resistance to ripping, often measured in newtons, while tensile strength tests the overall ability to resist pulling forces; both tests provide important yet distinct durability information.